Friday, December 23, 2011

Quick Post: Windmills Snowflakes and a Merry Christmas!

Just a quick post, hopefully. Nothing to really report since my last post. I have four days off starting tomorrow, and will be going to my parents tomorrow morning. We don't have much snow right now, and the weather is supposed to be good for the weekend, so hopefully the trip both ways will be good. I have my Etsy shop in Vacation Mode until I get back, so if anyone wants anything, you'll have to wait until the 28th.

As I mentioned in the last post, I had an idea for a tatting project. I think they turned out pretty well:


Yes, you are not seeing things. These are both snowflakes based of off Mary Konior's Windmills motif. The blue one was made first. Basically, I  threw a ring of 7-7 off of the first picot on the final round. Beads were added to the picot of the rings. I also added beads to the remaining picots on the final round. The white snowflake, tatted second, has a trefoil thrown off of the first picot of the final round. The trefoil consists of R1:7-4-3 R2: 3+6-6-3 R3: 3+4-7. Beads were also added to the nonjoining picots of the rings. I did not make the second picot on the final round. The remaining picots also have beads added to them. Since I can't share the full pattern, you'll need Mary's Tatting With Visual Patterns book to make the snowflake. Again, if you don't already own this book, please buy it from one of the many tatting and lacemaking suppliers, and not Amazon and eBay. Both snowflakes were tatted with Lizbeth size 20 thread. I don't feel like looking up colour numbers, but if anyone wants to know, feel free to ask in the comments.

Before I go, I want to wish everyone a Merry Christmas and a Happy New Year. I do plan on getting some tatting done while away. I'll try to post again before the year is out. Till next time.


Friday, December 16, 2011

Another Snowflake and Pretty Flower Photos

Sorry. I had hoped to post earlier this week but I either forgot (really!!), had to work, or just didn't feel like it. I haven't tatted since I finished the snowflake I mentioned earlier. I had several welcome sales in the shop (Thank You!!). I have to remake a few of the sold items, although I will take this opportunity to change colours, metals, and/or beads used. Naturally I need/will need to photograph the new items, so I am hoping the weather will be nice this weekend. I had a small chainmaille project this evening to work on. I was approached at work about modifying a chainmaille glove for one of our butchers who is, um, missing part of a finger (I don't know the backstory in case you're wondering). In the end we decided I could probably repair the old one; it has (well had) a small hole in one finger. It's all fixed now, so I will have to return it tomorrow and get paid for it. I do plan on tatting tonight if I can get this post written quickly.

So, I finally got the latest snowflake scanned. It's been tatted for a few weeks now. It's another one of Jon's snowflakes from her newest book Elegant Tatting Gems.

This is Kencana, done in Lizbeth size 40 thread in colour #164 Blue River Glades. I know it's not snowflakey in colour but I kinda like it. The three snowflakes I've tatted so far and probably those I will tat before Christmas will be given away. I like this pattern. It was pretty quick to tat once I tamed the thread.

Finally a few pretty flower photos to share. I'll try not talk, er, type too much here.


First up, I want to share a Gardenia flower with you. I have to say, it's not the same one I posted about earlier. That one developed/came with a bug problem. Hopefully this one will do better than the last one. It has several developing buds on it, so I hope to see more flowers into the new year.


You've seen this orchid before. It's a Paphiopedilum spicerianum 'St. Alban' x self. I am puzzled over why this plant flowered. You see, the plant has been growing quite well since it last flowered. The pot was packed and unfortunately was developing a scale problem. I decided to split the plant. A few weeks after I divided the plant, I noticed a bud on the baby plant. I didn't see the bud when I was repotting the plant so I may have triggered the plant to flower (trauma, perhaps??). I probably shouldn't have let it flower, but since it's living in a large Ziploc style bag it might be OK. We'll see.

Finally I want to share a new acquisition for my plant collection:


This is an Oncidium 'Sweet Sugar', I think. That's what the label on another plant that looked exactly the same as this one. I really didn't need this plant, but since most of the stores around here only sell Phalaenopsis orchids, I needed it because I don't see these much. The care sounds pretty easy, so hopefully it will be around for a while. Preferably in flower.

That's about it for now. Like I said, I'm ichin' to tat tonight-I have an idea. I wasn't planning on posting until after Christmas, but I might post early next week if my idea works. And, since I'm sure many of you are wondering and I just found a good place to mention it, the t-shirt survived the washing machine! Like there was any doubt........really. Till next time.

Monday, December 5, 2011

T-Shirt Complete!

I'm going to make this a quick post (hopefully). Nothing really new since my last post. I did get a sale over the weekend, which is awesome, though that pretty much covers my Etsy fees for the month. Anyway, I'll get straight to the point; it's getting late, but if I don't post tonight, I may not for awhile.

As the title suggests, I finished tatting and sewing on the edging to the t-shirt for my mom. Here is the final result:


Overall, I'm pleased with the result. Although I'm not sure I am willing to do it again. The tatting was pleasant to do. The sewing, not so much. I still have to wash the shirt to test it. I'm a little nervous about it. While I'm sure it'll hold, I wanted to get photos first in case of the unthinkable. I deciphered the care tag on the shirt and while it's machine washable (inside out), it's not machine dryable. Which is probably good in regards to the invisible thread. I'll have to type up care instructions to include with it.  I really hope my mom wears it and doesn't put it away for fear of damaging it. Hopefully it survives the washing machine.

That's about it for tonight. I have a couple of flower photos I wanted to share, but they will have to wait. Which is probably for the better. Technically, one of the flowers isn't opened yet, but will be in a few days. I am currently working on a couple of crochet projects. I'm going to have to get a hold of a size P crochet hook, as the Q that I have is too big (I don't have a P hook and though a Q will work). I will share these as well. I also finished the snowflake I started before moving on to the t-shirt edging. Till next time.


Wednesday, November 30, 2011

T-Shirt Edging: Part 2, One Side Done

I guess I'm not updating as much as I should be for this project. I'll get to the details soon; I don't have much to talk about. Sales are practically non-existent in the shop right now. I am offering free and reduced shipping right now. It started as a Black Friday/Cyber Monday thing, but didn't help, so I decided to keep it for now.  I keep getting my shifts shuffled around at work lately. This isn't completely bad-I do get tired of the same thing week after week. Though it does mix me up a bit. Came home completely exhausted yesterday and didn't get anything done except sleeping. But anyway, I do have a few things to show you.

I have one sleeve done. I don't know if I did it right, but it looks good to me.


As you may (or hopefully may not) see, I decided to go against the rather overwhelming advice of not using invisible thread, and used invisible thread. It wasn't that difficult to use. It did catch on the tatting during the sewing process, but I'm sure cotton thread would do the same.  I was careful to anchor the thread securely in and over a convenient hem. Once finished, I anchored the thread securely inside a convenient hem. I also sewed the ends from the tatting inside a hem as well. Once I have sewed the other edging on, I will wash the shirt once or twice to see how it holds up. BTW, I did wash both the tatting and the shirt before sewing them together.

That's about it really. I hopefully will finish the second edging tonight-it should have been done days ago, but I guess I'm getting tired of it. Combined, the edgings are about 28 inches long; not huge, but this is the longed piece(s) of edging I've ever tatting. I'm getting in the mood to tat some Windmills motifs. Till next time.


Tuesday, November 15, 2011

Tatting Tea Tuesday: T-Shirt Edging, Part 1

Yup, you read the title right. It's Tuesday. I've been tatting. And I'm drinking tea. Well, it's iced tea. Iced Earl Grey tea actually.  Made using the Tassimo coffee machine I HAD to get. That's what I keep telling myself. Anyway, I wanted to do a quick post about the edging I mentioned in my last post. Due to a thread breaking on the snowflake-not related to damp thread or anything-I stopped working on the snowflake and started my edging. Actually, I think the problem I'm having with thread breaking is that my tension is too tight. This makes the rings hard to close, and I end up breaking the thread. I experimented earlier with careful control of my tension which reduced the problem. I forgot to mention it in my last post. While I can (and will eventually) reattach the thread and continue tatting the snowflake, I have set it aside for now. I really what to start this edging project. I don't expect to run out of thread, but I wanted to allow enough time to order more thread if necessary. And possibly other threads. And a couple of those cool looking thread holders. Perhaps a few more shuttles....

Anyway, I picked a pattern for tat, and started it last night. I picked Mary Konior's Convolvulus edging pattern from her book Tatting in Lace.


And here it is against the T-shirt I selected:


I think it works, but I want your opinion. I still have a few questions about sewing it on the shirt. Thanks to everyone who commented on my last post. I greatly appreciate it. I understand that I should use a matching colour thread to sew on the tatting, but what am I matching the thread to? The t-shirt or the tatting? I assume the tatting. The general consensus of the people who commented was that I want a pattern that has few decorative picots. This pattern has no decorative picots. While I'm sure it will make sense once I start sewing it on, but how exactly do I sew it on? Hopefully I haven't bitten off more that I can chew!

You might have noticed the shuttle in the first photo. It is my newest Pop-a-Bobbin shuttle. It is made out of Olive wood. I love it! I love how it looks marbled. And surprisingly (or maybe not so much) it smells like olive oil!? Before you ask, I don't normally smell my shuttles, but the odour was noticeable as it was warming up after being in the mailbox for a few hours. It's actually kinda nice. I don't like olives, but I have recently started using olive oil in my cooking so I have grown accustomed to it. I can't wait to see what other woods Sally and Nick get their hands on. I'm already looking forward to the Zebra wood that Sally recently showed off.

That's it for now. I will post again soon. Now that I finally memorized the pattern, I am tatting this pretty quickly. Apparently, I can't follow written patterns anymore-I had to draw it out first. The current length is about doubled what is shown above, and I'm one or two motifs away from completing about half the required length. So, if anyone sees a problem with the pattern or thread colour, please comment ASAP. Till next time.


PS: Diane, please take a number!

Saturday, November 12, 2011

Cintamani Snowflake: The Next Snowflake

Well, I seem to have disappeared again. At least I have some tatting to show. I've got nothing really new to report since my last post. It snowed here last Sunday. I locked myself out of my truck last Sunday as well-don't ask. The snow started to melt later on in the week. We got a bit more snow last night. I can't use four wheel drive right now since I had to change a tire before it snowed and my spare is a little smaller than the other tire. I really have to get my other tire fixed. Sales have slowed down in my Etsy shop, which gives me more tatting time. I don't expect too many sales for the Christmas season; I haven't seen a huge increase in sales during this time in previous years.

Before I get to the tatting, I do want to clarify something that I mentioned a few post ago. This is regarding tatting with damp hands being a cause for the thread to break. I should say that the thread probably won't snap just because it is damp. As others have mentioned, tatting with damp thread is a littler tougher since the thread sticks and just wants to be difficult. I don't know about the rest of you, but when a ring won't close, I pull harder. When I pull harder, the thread will probably break. I have found, lately, that if I can't close a ring I set it aside for 20-30 minutes. I seem to be able to close the ring much easier. I don't know why.

I promised another tatted snowflake, so here it is:

This is Cintamani, the 5th snowflake from Jon's new book. I tatted this in Lizbeth size 40 thread in colour #166 Pink Cocoa. I still don't know why I bought this thread. It looks so feminine. It looks so delicious. So decadent. So ........, um, I don't know why but I suddenly crave chocolate and raspberries.

Finally, due to a recent post by Fox about adding a tatted edging on a jacket, I have decided I want to try tatting an edging onto a t-shirt for my mom. I haven't decided on a pattern yet, but I do have the shirt and what I think will be a good thread to use.


I haven't done this before, so if anyone whats to comment with some hints, I'd greatly appreiciate it. The shirt has a bit of stretch in it; hopefully that won't be an issue. At this time, I only plan on adding an edging to the sleeves, but we'll see how quickly this comes together. I'll definitely provide updates on this project. I may need to change the thread if needed (it's Lizbeth 20 in colour #129, Purple Splendor). I'll start working on this as soon as I'm done the snowflake I'm working on right now.

That's it for now. Hopefully I can post again soon. Till next time.


Monday, October 31, 2011

Happy Halloween!!!!!!

As the title says, I hope everyone is having a Happy Halloween. I had to work today, but my workplace allows us to dress up. There wasn't very many of us who dressed up, but it was fun anyway. At least I didn't have to wear my uniform! Anyway, I do have a small amount of tatting to share.

I decided to tat my own Ripley the Ghost, though not in white:


The thread I used is Lizbeth size 20 in colour #149 Peacock Blues. Who said ghosts have to be white? I had a heck of a time following the pattern. I wonder if there are errors in it that were missed? I know one ring, R8 should be a SR. And the SR9 should be R9. R13 should also be SR13.

Finally, here is a picture of me, wearing my costume:


Happy Halloween!!!

Thursday, October 27, 2011

First Snowflake of the Season

Well, howdy. It's been a while, hasn't it. I haven't done much tatting since my last post. I have been pretty busy with chainmaille lately. A number of orders have trickled in over the past few weeks which have been keeping me busy. I also worked on a birthday gift for my mom; which was mostly chainmaille. I'll show you later; the photos aren't edited yet. I'm also working on my Hallowe'en costume this year; that'll come later as well if it works out. I have done a little tatting, which I will get to soon.

Before I get to the tatting, I want to mention a quick Etsy related thing. Recently, Etsy has allowed shop owners to change the name of their shops if they wished. When I joined Etsy, I didn't plan on selling, so I used a username I use regularly. I have changed my shop name to something a bit better. For anyone who hasn't noticed, my shop is now called Bridge City Maille. I am offering free shipping for a few more days for anyone interested.

As I said, I managed to get a little bit of tatting done. The motif I made is one of Jon Yusoff's newest  snowflake patterns from her book Elegant Tatting Gems: A Collection of Snowflake Designs.

This is Baiduri, tatted in Lizbeth size 40 thread colour #163 Blue Ice. The colour isn't really this dark. I should have used a dark background, instead of white. I had to darken the colours in order for it to stand out. This is one of Lizbeth's newest colours. I really like it. Actually, I like several of the new colours, and couldn't resist ordering some no matter how hard I tried. Thanks Isdihara. See what happens when you post pretty pictures of new thread on your blog. Where do I sign up to be an Unrepentant Thread Junkie?


I'll be honest, I don't know why I bought the Pink Cocoa (bottom right). I don't like pink, but I like the combination. Must be the cocoa part. You know, the chocolate connection. Going back to the snowflake, I didn't have problems tatting it. Well, except for the centre rings. I guess I looked at the wrong ring on the diagram. Surprisingly it still worked with some minor blocking. I also had no problems with the thread breaking. I believe it was also Isdihara who mentioned that having slightly damp hands (like right after washing them) while tatting could weaken the thread enough to make it break when closing rings. I made sure my hands were nice and dry before tatting. I also tested this theory with the leftover thread once the snowflake was done and did find the thread snapped quite reliably when my hands were damp. It's something to think about for anyone who's having trouble with thread snapping regularly. Not just Lizbeth.

Finally before I go I wanted to pass on some information I got from a recent comment. Apparently, the tatted filet John and I had tatted is a pattern by Christel Wutzmer and Agnes Focke from Doppelknoten Nr. 7. I can't confirm it until I get a copy, but I thought I'd mention it. I am seriously thinking about getting a copy if possible. Anyway, I hope to do some tatting yet this evening, and perhaps over the weekend. I am planning to do a quick post Monday, but we'll see. Till next time.


Saturday, October 8, 2011

Tatted Filet And an Alligator

I bet you'll never guess what I have been up to lately? Go ahead, guess. Give up? I've been tatting! I know, right. I got into tatting a pattern from one of my new tatted bookmark books. I'll get to it and the other tatting soon. I'm not sure when I'll get back to tatting. I am currently working on a custom chainmaille piece right now. I will probably run out of rings (this was mentioned to the customer) and they won't be in until Tuesday or Wednesday. I'm also planning on redoing my packaging options. Since Christmas is going to be here before we know it, I'd like to offer gift boxes for all items. I discovered several Canadian companies offering packaging options, so I may order from one of them. I'll share more on this later if I go through with it. I am also offering free standard shipping for the next week or two for anyone interested.

As I said I managed to do some tatting since my last post. The first being a bookmark from Animal Bookmarks: A Tatted Zoo by Diane Stevens. Lots of pretty patterns in this book. However, there was one that I really wanted to try. That one is, of course, the alligator. Here she is:

Yes, she. This is Gertrude the 'Gator. See her eyelashes. That's where the pattern starts and ends. I didn't really want to deal with the ends, so I just trimmed them. I do plan on making another one soon. For anyone wondering, I used Lizbeth size 20 in colour # 152 Christmas Green Mix and #684 Medium Leaf Green. I discovered while tatting this that I really need more green thread, in different shades.

The second major tatting project for me was one you may have seen recently. John shared a vintage tatted edging with a really cool tatted filet pattern. I was fascinated with it as well. A commenter, Erin, provided a pattern for the filet section after reviewing the photos. I had to try it. Here is the result:

I decided to turn my piece into a bookmark. It is 6 inches long and about 2 1/4 inches wide. I used Lizbeth size 20 thread in colour #663 Bright Turquoise Dark. I really enjoyed tatting this pattern. It was completely relaxing and once the pattern was established after a couple of rows, you really don't need to refer to the pattern again. The starting point needs some work though. I'm curious to know where the original pattern is from. It's NOT the Mary Konior Filet pattern, unless there is more than one and I missed it. That pattern looks like this:


If anyone knows the original source of the top filet pattern, please let me know. It really looks familiar. Whatever the source, I would like to tat another bookmark, maybe slightly narrower, in a different colour.

That's it for now. As you may have heard, it's Thanksgiving this weekend here in Canada. We'll see what happens over next week. I do want to do more tatting, but the chainmaille project comes first. Till next time.


Thursday, September 29, 2011

A Little Tatting, New Shuttles, and a New Temari Ball

I've been trying to do more tatting. I really have. However, I have been preoccupied with something since last Saturday. Something tragic. You see, the set-top box for my IPTV service died. I'll give you a moment to mourn. OK, I realize it may seem weird for me to feel this way. But, I do love TV, even though it's not really good to watch too much. I do a lot of my relaxation activities-tatting, chainmaille, etc, while watching TV. I can't focus on whatever it is I'm doing without having the TV on. I can watch what I'm doing while glancing at the TV regularly. In case you're wondering I got sick of watching movies by Sunday night. I started going to bed early too. Over the air TV wasn't an option, since Canada recently switched to digital TV, and I didn't have a compatible antenna. I do now. Finally on Wednesday, a Sasktel technician/installer was able to come out and replace my box. While we were waiting for the box to upgrade its firmware and reboot, the Sasktel guy got fascinated by my carnivorous plants and I spent the time showing the plants to him. So after all that, I have my TV again, and all is well. And that is why I have little to show.

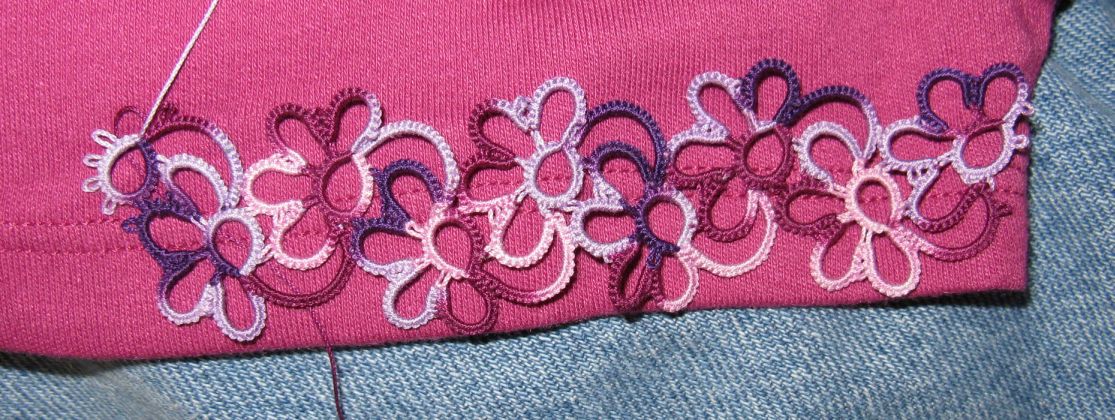
I did manage a little tatting. However, I don't have the item finished. I had a heck of a time with the pattern. It's not the patterns fault; it was one of Jon's new snowflake patterns. It was me. I kept joining to the wrong picots, and made many other errors. I also had to deal with the thread I used snapping several times. I think it was three times in the small amount of tatting I accomplished. I'm sure some of you are wondering, so I will mention that I was using Lizbeth thread, size 40. I don't blame the thread. All three times, the thread snapped while I was closing a ring. I'm sure the last stitch became unflipped or something. To make myself feel better about it, I'm going with the idea that I'm becoming much stronger.

It occurred to me that I haven't shown you guys my newest Pop-a-Bobbin shuttles. So, in an attempt to show both them, and the pitiful amount of tatting I've done, here's a photo:


The front shuttle is made of Purple Heart, and the back shuttle is Mahonia wood. Jane assures me that the colour is natural. The colour of both shuttles is amazing. Now, if only there was a tree that produces naturally blue coloured wood. I might sit down and continue with the snowflake. I started another project, using Lizbeth size 20, so if all goes well, I should have a more substantial amount of tatting to show the next time.

Finally, I finished another Temari ball. This one I started a while ago, but set it aside when I had issues with it not being perfectly round. I did manage to divide it up the best I could. Here it is:


This one is called Buckles and Bands. It's similar to one I did earlier, see here, though I like this one better. If you'd like to try making a Temari ball yourself, the designer, Barbara B. Suess, has several patterns available for purchase (including the one above) here. She is also the author of the book Japanese Temari: A Colorful Spin on an Ancient Craft, I love this book and it's great for beginners. I used a styrofoam ball for the core again, and that may be why I didn't get the ball perfectly round. I'm going to try to make my own cores, called mari, using dryer lint, and cloth scraps (separately). I'll be sure to share when I get around to doing this.

That's it for now. With any luck, I'll have a significant amount of tatting to show you. Till next time.


Sunday, September 18, 2011

Dawg Hoodie, Complete!

I managed to accomplish something since my last post. Something of my own anyway. I'm watching the 25 Motif Challenge blog for Sharon while she gets better. After two trips in two days to Michaels-though the second trip wasn't exactly planned (let's just say it involves the glass of a newly purchased frame and a chair), I found the shade of grey I wanted for my hoodie. I'm going to try and make this short. I really, really want to do some tatting tonight before I have to go to bed, so I can get up and work in the morning.

As I said, I found the shade of grey that I wanted for my Dawg Hoodie, a pattern from The Crochet Dude's Designs for Guys book. The yarn I chose is Patons Classic Wool Merino, a 100% wool yarn. It's not the type of yarn I wanted (and may not be compatible with the acrylic/cotton blend yarn I used) I think the properties of the yarn can work in this case. Wool will shrink and felt if machine washed if care isn't taken. For ribbing, this could work, as I find that the cuffs tend to stretch more than the rest of the garment, so when washed (carefully) they'll shrink back down. If it turns out I'm wrong, I could simply cut off the ribbing and remake with a different yarn. We'll see. Anyway, here are some pictures. First just the hoodie:


 Try and ignore my feet seen at the bottom of the photo. I placed the hoodie on my bed, and had to stand on the end of the bed to take the photo.

Here are the required(?????) photos of me wearing the hoodie:


The second photo proves I actually have a pocket on the front of the hoodie. It blends in remarkably well. Which it kinda good, as it's not quite centred, and my sewing isn't the straightest. Finally a photo showing the hood:


I don't like this photo as much as the previous two, the first one is my favorite. As an aside, I am pleased to say that I am a little over 21 pounds lighter in these photos than I was when I posted a photo of me wearing my Hauberk back in May. Please ignore the empty photo frame on the left side of the photo. It may or may not be the one that had the incident with my chair. Also ignore the fact that the above three photos don't show the drawstring of the hood. I was so excited to have the hoodie done, I put it one\ and took a bunch of photos before I remembered I forgot the drawstring. So, what do you guys think? Is that the right shade of grey or what?

That's about it for now. I am going to try and tat this evening. If I do, then I should have something new to post about. Oh, before I forget, what do you guys think of my new header? I've been wanting to make a new one for a while. I found the photo of one of the city's bridges (it's called the University Bridge, if you're wondering) at Wikimedia Commons, and the site says it's in the public domain. That's it for now. Till next time.


Monday, September 12, 2011

Posting for the Sake of It

I have nothing really to post about. I feel that I should, but that's it. As I said in my last post, I went away last weekend for a few days. It was nice to get away and not to think about work and stuff.  However, I really haven't done much since I left (and subsequently returned). I do plan on tatting, but all I've accomplished was to pick out a pattern or two that I want to start. I still have many UFO's and WIPs/WISPs that need to be finished. I did manage to make a couple new pairs of chainmaille earrings, and planned on photographing them this afternoon after work. However, I was asked to stay longer, and I agreed, so I missed the optimum time for photographing. I do all my photos outside. I should probably look into other options. My hoodie is still on hold, however, I'm going to have to get it finished as it is getting a bit cool in the mornings and I'll want to wear it. We may even get frost within the next day or two. Hopefully not, as I don't want to deal with the potted outdoor plants yet. I did bring in two "houseplants" that I had outside- a King Sago and my Ginkgo tree.

Thanks for the comments on the last posts. I'm glad you guys like the bookmark in black. Actually, I really like the way tatting looks in black, but I find it a pain to tat with black thread. Miranda, my split chains are far from great, but thanks for the compliment. And thanks to Marla for the comment about my orchid. Apparently this offsetting behaviour comes from the Doritis parent, so it may be considered normal. I may leave the baby on the parent plant for now. It's kind of incredible that we're almost two weeks into September already. Hopefully I'll get a lot done over the next few weeks. I would like to get some tatting done to show you. I kinda feel bad when I don't have any new motifs to show you. I don't like simply not posting either. We'll see what happens and I'll try and post again soon. Till next time.

Wednesday, August 31, 2011

Final Black Magic Bookmark and Random Orchid Photos

Sorry for the delay in posting. Actually, I'm doing this on purpose. I had meant to post over the weekend, but since I am going away for a few days, and won't be posting till I get back, I thought I'd wait a few extra days. I've done a little tatting lately. Mostly finishing on a bookmark I started  over a month ago. I started tatting another bookmark, different pattern. And I've been tinkering in designing, but I'm not ready to show anything from that. You're not missing much!

I've got my hoodie on hold for now. I had hoped on more input on colour choice for the ribbing, see previous post for details. I'm going to look for a darker grey colour before deciding for sure.

As I mentioned, I finished a bookmark I started some time ago. It's another one of Mary Konior's Black Magic bookmarks. This time I kept the colour simple, and made the bookmark, black!


I also decided to end the bookmark in a more finished manner. While trying not to, I basically did what Miranda did with her bookmark. It became apparent that I should have started the bookmark with a chain instead of the large central ring as I had to do a split chain (that wasn't split) for the final chain joining to the central ring. I could then tat the end chain as a split chain as normal. I continued with a lock stitch chain with a few split rings that mimicked the central rings. I finished with a round motif based off of the Black Magic pattern. While I liked the fan that Miranda ended with, I felt the round motif was more manly. The bookmark was done with Lizbeth size 20 thread (I didn't have size 40 then, I do now) in black, colour #604.

Finally I'll end this post with a couple of photos of one of my Phalaenopsis orchids. It's doing something funny. Well, maybe not funny, but unexpected. And I don't know why.


The first photo was taken when I first found the plant(s) about a month ago. The second photo was taken a week or so ago. My understanding is that these plants aren't supposed to form offsets in this fashion. The only time, that I have found, that a Phal should do this is in the event the the growth point is damaged, perhaps from rot or something. Phals belong to a family of orchids which are known as Monopodial orchids. That means that they have only one growing point and generally grow as a single upright stem. From what I can tell, the main plant seems healthy and is currently growing a new leaf. The offset is growing roots (you can't see them, but they are there), so once it's big enough I'll separate it off. I don't what it sucking too much energy from the parent plant, and it could break off, fall off by itself. In case you're wondering the plant is called Doritaenopsis Long Pride Fancy 'MP0653' which you can see here.

That's it for now. I should be getting ready to leave tomorrow, so I gotta go. Hopefully I'll post early next week. Till next time.

Monday, August 22, 2011

Nothing New, Just Some Updates

I haven't done much, so I don't have anything new. I did get another order last week, so I worked on remaking the sold item. But other than that I haven't done much else. I did finish crocheting the hood on my hoodie. I still need to do the ribbing, and, uh, I have to sew on the pocket. I forgot about it until I posted the photo. I also forgot that the the hood has ribbing on it as well, so I definitely don't have enough yarn to finish it using the same yarn. I stopped at Michaels last week to buy some dark grey cotton/acrylic blend yarn. Big surprise I didn't find much. Actually, I didn't find any. Instead I found some 100 % cotton yarn in black (called Ebony) in the Loops and Threads brand (I believe its a Michaels brand/exclusive) and some grey yarn in a bamboo/wool blend from Stitch Nation. Here's some photos:


I really don't know which one looks better. I was hoping for a darker grey (or lighter black!). I really think the black may be too dark, but the grey may be too light. I do prefer the grey, but that may be because I want to use a bamboo yarn for something, though now that Michaels has this line of yarn I may be able to find another project to satisfy that need. Let me know what you know what you think. I may have to go on another quest for the prefect grey cotton/acrylic blend yarn.

I mentioned in the last post that I had purchased an LED light system for my aquarium. Well, it looks great and produces a fair amount of light. As I said, time will tell if the plants appreciate it. One cool feature of the unit is that it has "Moon Lights". These are blue LEDs that mimic the light of the moon. Makes the tank look pretty cool:


You can't see the fish (I can't anyway) but it still looks kinda cool. Moon lights aren't really for freshwater aquariums, they're more for reef setups, so I won't be using them much. But I had to try them out at least once.

I had a request for an update on my five new Nepenthes (tropical pitcher plants) plants. Here is a (fairly) recent photo of them:


Four out of five are doing pretty well. The fifth, the one on the front right, isn't doing so hot. Fortunately, it was also the least expensive of the five (well, if you don't count the one provided as a free gift; it's right behind the dying one). I'm not really that disappointed. It's a fairly common plant so I should be able to replace it easily. I have been opening the cover regularly to let some fresh air in. I'll try and remember to provide another update in a month or two.

Finally, here's an update for another plant that I haven't mentioned for a while. It it, my Tillandsia, or Air Plant:


It (they?) has/have grown since you've seen it last. And, if you look in the second photo, there's going to be another plant in the near photo. I'm surprised on how well it's doing. Since my first one died after flowering, I assumed this one will too. Though the first one did spend a summer, a Canadian summer, in near full sun all day and not watered nearly enough. That is probably why it died. My understanding is that some, if not all, Tillandsias will form clumps or clusters. I think it will be quite spectacular once it gets really large as there may be numerous plants in flower at any given time, or perhaps the whole plant at once. I will try to provide updates on this plant too, but since it grows rather slowly, it won't be very often.

I think that will be all tonight. I do have more plant photos ( I really want to show you what one of my Phalaenopsis orchids is doing) but they will have to wait for another day. I bought a bunch of new findings recently as my main supplier got over a hundred new items. Two of the findings I bought include some hair clips and some solid stainless steel toggle clasps. I will have to get some photos with the toggle clasps and play around with the hair clips so look for that. I have been working on some tatting, so hopefully I will have some tatting to show soon. Till next time. Goodnight!

Thursday, August 11, 2011

Almost Done Hoodie, and My New Tatting Books

Well, I finally get to post. Between work, several welcome sales, not feeling well earlier this week, and other stuff, I never got around to posting. That's not to say I have that much to post about. As I said, I got several sales, which was awesome as they allowed me to purchase a(n) LED light system for my aquarium (without having to wait until payday). Hopefully my aquatic plants like it, though it will compliment my existing fluorescent light system. Anyway, my main focus tonight (or whenever you read this) will be a status update of my Dawg hoodie.

I finished the last sleeve towards the end of last week (I think). I won't bore you with a photo of it since, well, it looks just like the other one. I had hoped to sew everything together Sunday, but a surprise visit by my parents meant the hoodie had to wait until another day. That day was Wednesday.


Nothing special to report here. As expected, all matching pieces were the same size. In case you're wondering, I folded the sleeves down for the picture so more of the hoodie is visible, or rather less background is visible. There's not much left to finish. Basically, the hood part and the waist and sleeve ribbing. There's also some ends to hide, but it's not a big deal on a crochet project. There is one problem. I may run out of yarn (again!!). It's my fault; I had figured out how many skeins I would need, but decided to round the number down since I was making the sleeves shorter. I bought 8 skeins of yarn. I have one left, plus a little of another skein. This really may not be a problem after all. I will finish the hood with the skein I have left. Once that's done, and I know exactly how much yarn is left, I can figure out what to do next. What I have been thinking was that if I think I have enough (probably not) I'll do the ribbing in the remaining yarn. If I don't think I have enough I can either a) try to find a matching skein of yarn with the same dye lot or b) do the ribbing in a different colour (either black or grey). I like option a but it's probably unlikely I can match the dye lots. I'll probably go with option b, with a yarn of similar content if possible. I'll update you once I get this far.

Finally I will finish this post with something tatting related, since I haven't posted anything tatting related for awhile:


These are my newest tatting books. I've been looking through both books and have several bookmarks picked out that I'd like to tat. I do have a few projects in progress that I'd like to finish first. Of course, the finishing of my hoodie has to be done before I can tat.

That's about it for now. We'll see what happens over the next week or so. I have some chainmaille to show you-I played with my camera last week and got some pretty good photos. I think everything I've made is listed now, so feel free to look at my shop to see the new items, if you'd like. Till next time.